Well, it was so much fun to design and make things that I continued :-)
Stay tuned for what comes next.
Blog posts appear in the order that the most recent one is on top.
Our bedroom faces east which results in a strong morning sun tickling our noses unspeakably early. An old curtain was not wide enough, therefore I made a new one yesterday.
The next project was a curtain for our store room. We had a door that after a while fell from its frame. This way we found that it is much more convenient to not have a door there. We use the store room quite often while cooking and it is great to be able to kust walk in instead of opening and closing a door. The drawback is that then we always look into the cluttered room. Therefore, I made a curtain as is done for Japanese doors, calles Noren. The can be found as entrance to restaurants and bars but also in other places. The following images show before, after and the vecro attachement on the door frame.
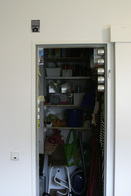
This is how the store room view was before. View is from kitchen.
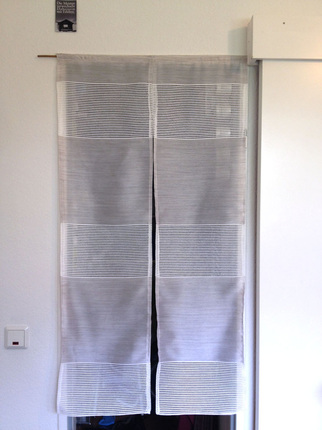
This is how the curtain looks. It is basically two shawls that are connected in the top 15 cm. We can move through the shawls without using the hand in upright posture. And they let enough light through that with lighting in the kitchen or during daytime there is enough light inside the store room to see anything that we need to see. :-)
Notice the little bamboo thingy on the left. Usually, a Noren hangs on a stick, e.g. a bamboo stick. I made it more practical for our door and setting using a velcro attachment (see below), as there is the bulky box of a sliding door to the right and the velcro makes the curtain sit strongly on the door frame. To make it look more Japanese, I slided a small piece of Bamboo into the sewed in tube at the top of the Noren.
"I love it when a plan comes together", Hannibal, A-Team

Here the adhesive velcro strip can be seen that goes along the topside of the door.
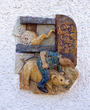
Near the entrance door of our new flat is a 3D ceramic tile. It shows somebody sitting on a pig with a knife, in the very moment before killing it... We only moved in on base that we were allowed to do something about it, for example remove it. Simply removing it would have left us with the problem of an odd looking hole or a different looking odd shaped surface. As an initial thing I covered it with a white plastic bag piece. Then it sat there until two days ago.
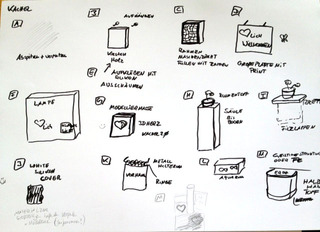
Then I did 10+ concept ideas that then, without a formal matrix, evolved into the last presented version [M] (in pencil)
And here it is, the final tile. It took about 4-5 hours to make it. The material is Moltofill, a cement based white material that is mixed with water and feels like using plaster. It holds well on the ceramic which was surprising but assured by the technical specifications (it said any material...). The 3D structure of the tile also helped in supporting parts of it. It is also designed in a way that it might contribute a little bit towards happiness and grows of all beings (it has some hidden treasures).
Click on images for larger version


 RSS Feed